In this how-to on installing or changing out your AR-15 rifle handguard see how the Brownells Wrenchman breathes new life into a well-used AR15 black rifle.

USA – -(AmmoLand.com)- Installing a spiffy new handguard for your AR-15 used to be a somewhat complicated process, requiring special tools that almost no casual shooters have.
No more. The folks at Brownells have released the new Wrenchman series of AR handguards. What’s the big deal? All you need to install a spiffy new M-LOK attachment points is a crescent wrench. So, yes, the product name is descriptive of its function.
I should note that if you’re breathing new life into an existing rifle, you may need to beg, borrow, or steal the use of a barrel nut tool to get the old parts off. If you’re assembling your own AR from parts, you’re good to go with that standard crescent wrench, at least for the handguard portion of your build.
I tested out the Wrenchman by doing some cosmetic (and functional) surgery to an old Rock River Arms LAR 6.8 back that I purchased back in 1865. Or maybe sometime before 2010. Whatever the date, it’s an older model.
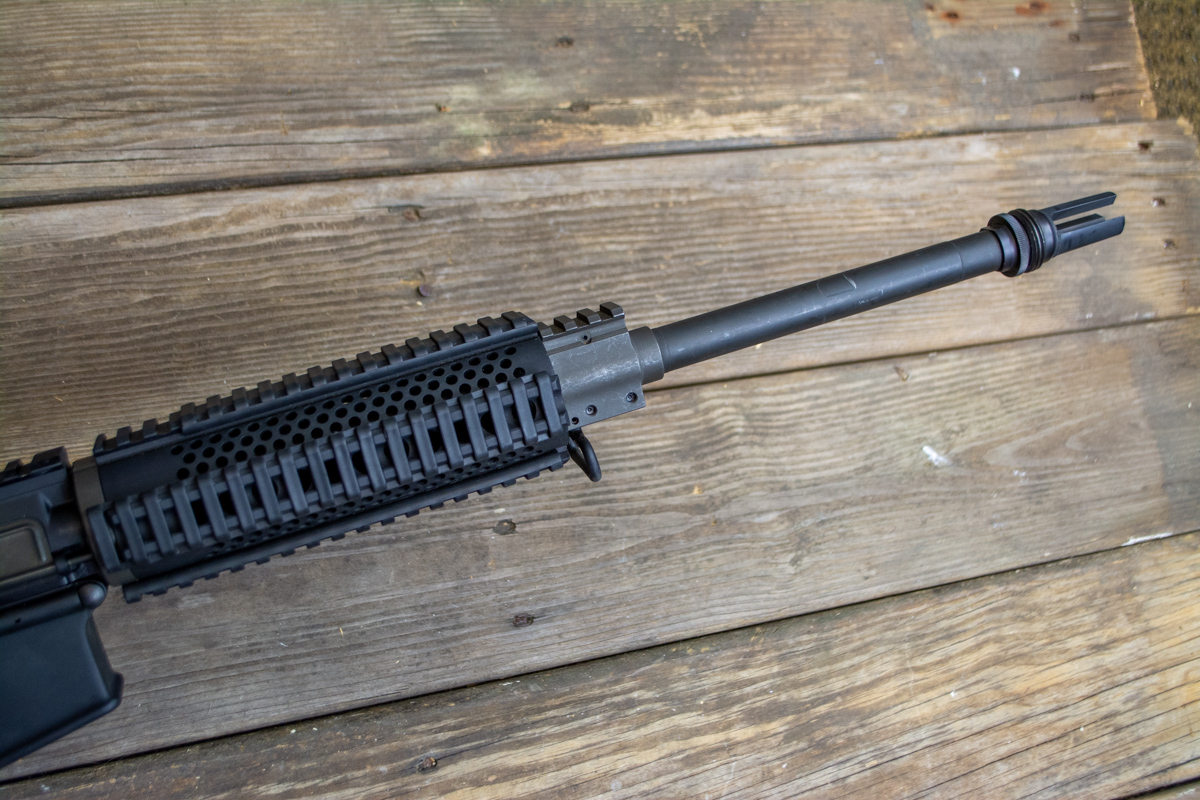
Back then, the cool styles du jour differed from today. Handguards were often short and bulky, with a circumference akin to that of a 55-gallon drum. This one, like many others of the time, also had rails on all four sides. That’s handy for mounting gear, but rails don’t make the best grip surface. To cure that ailment, I put Ergo rail covers on all surfaces not being used. That helped a lot but made the handguard even larger. Oh, and old-school handguards were short too. The one shown in the before pictures here measures just under seven inches. My relaxed support hand, including the thumb, is about five inches wide, so we’re not talking about a lot of extra grip real estate. On the plus side, it was a free-floated system, and because of that, it is shockingly accurate when using quality ammo or my special Sierra Matchking reloads.
I’ve been thinking this old AR needs a functional facelift for quite some time, but I hadn’t worked up the gumption to deal with shopping for, and figuring out how to install, a new one. It’s not a hard job, but I never got motivated enough to search the three billion handguards on the market to figure out which one I should buy. Then things got simple when I heard about the Brownells Wrenchman. The company bragged that the system is simple to install and requires no special tools, so I tried it out.
What’s a Brownells Wrenchman?
There are two basic styles of the handguard, and both are available multiple lengths. All feature M-LOK attachment points out the wazoo in seven angles around the barrel and a full-length Picatinny rail up top. The standard Wrenchman uses a shorter (front to back) barrel nut and two locking screws. It’s available in 10.5, 12.625, and 15-inch lengths. The Precision Wrenchman models have a longer locking nut for improved mount stability and three attachment screws. They’re available in 12.625 and 15-inch lengths and run about 20 bucks more than the standard models.

How to Install or Change Your AR Handguard: Tools Required
To install the Brownells Wrenchman, you will need to acquire some specialized tools.
Ready?
A Crescent Wrench. Yup, that’s it. I used a 30-year-old relic that’s done everything from fixing lawnmowers to serving with distinction as a hammer.
Removing the old handguard was a different story. I needed a barrel nut wrench for that. Fortunately, I have a multi-purpose AR Armorer’s wrench from Brownellsthat I use for many maintenance chores like installing and removing muzzle devices.
Removing the Existing Handguard
Before you start, it’s easiest to do this little project when working with the upper receiver only. Be sure to UNLOAD first and then separate your upper and lower receivers.

Step one of changing your AR-15 handguard is simple and requires no special tools assuming you’ve got a wrench lying about. You’ll need to take off the muzzle device. The old barrel nut and the new Wrenchman model won’t fit over flash hiders or muzzle brakes. Depending on how your manufacturer secured it, you might benefit from some gentle heating first.
This old Rock River rifle had a large and bulky gas block. As you can see from the photos, it also included a short rail segment. It’s lower than the receiver rail, so a standard front sight won’t even line up properly when placed there. I never did use it for anything. No worries. Since it was too big to fit inside the new Wrenchman handguard anyway, I replaced it with a new low-profile gas block, also from Brownells. The old gas block had two screws securing it to the barrel. After removing those, the block slid right off the end of the muzzle device-less barrel.

I tried to re-use the existing gas tube, but either long-term use or aggressive factory installation ensured that the tube and gas block were permanently welded together. If you want to take a shot at reusing yours, be sure to punch out the small retaining pin first in most cases that will release the tube from the gas block. Since mine was frozen, I trekked over to see the folks at the local gun store to buy a new one. They have everything, especially AR build parts and relevant knowledge to the build and customization process.
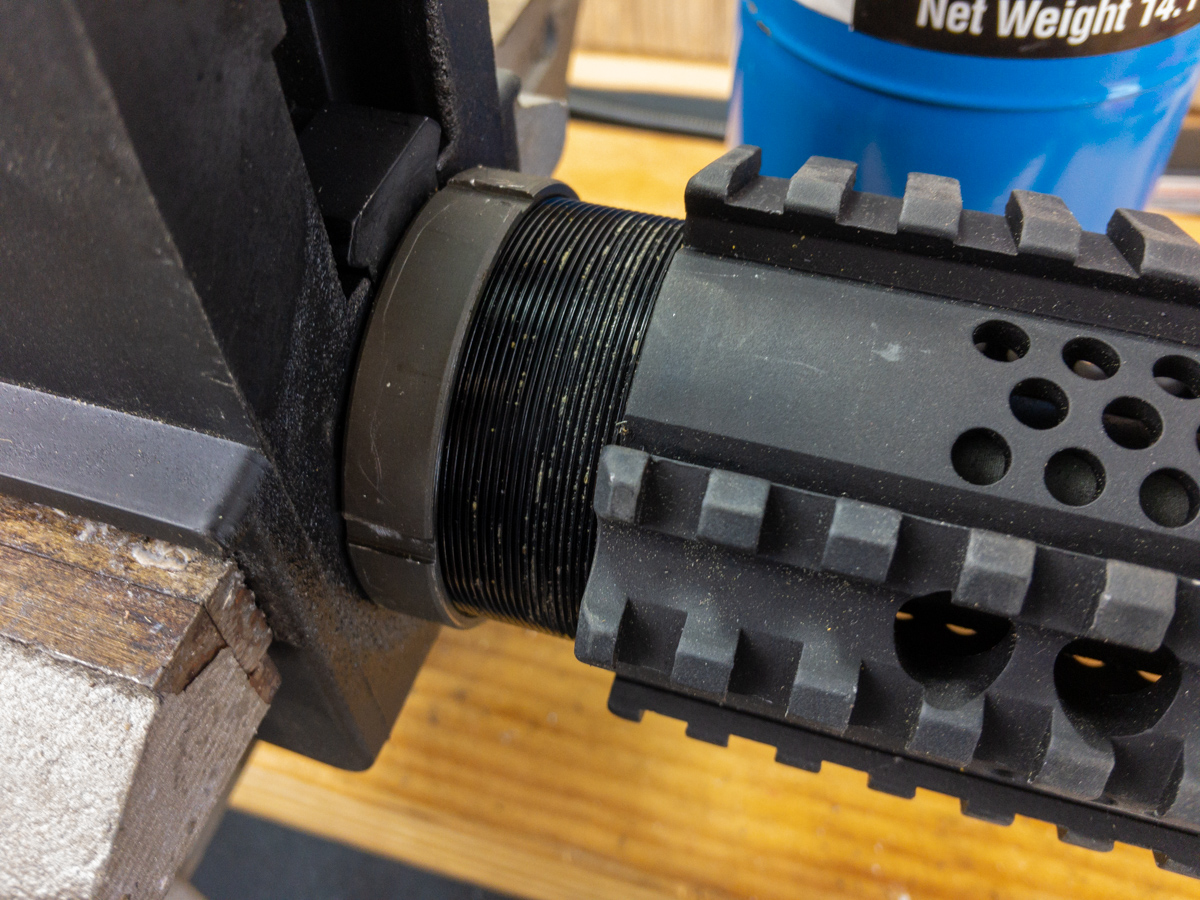
Every rifle is different, so your process will vary here. The Rock River free-float AR handguard screws onto a large barrel nut and uses a locking ring that screws tight in the opposite direction to “time” the handguard with the receiver so that the top rail lines up with the receiver. If you have such a setup, the locking ring will loosen when turned counter-clockwise as you’re looking through the sights. A little more gentle blowtorch heating and some moderate abuse with a screwdriver and hammer got me a loosened locking ring.
At this point, I could unscrew the rifle handguard itself. Again looking down the sites, it loosened when turned in a clockwise direction. Now all I had to do was remove the barrel nut itself. This is where the AR Armorer’s tool came in handy. If you don’t have one, you can either buy one or sweet-talk a local gun store or gunsmith to loosen yours if you don’t want to purchase your own. The tool is handy for other things, so it’s a good investment.
Fortunately, Bill at Palmetto State Armory gave me a heads up about Rock River barrel nut removal or else I might have given up prematurely. Apparently, the company hires Thor to tighten them, so you have to apply lots of force while taking care to support the upper receiver so you don’t bend or break that in the process. I used an upper receiver vise block to hold everything while I tapped the end of the AR Armorer’s wrench with a hammer to break free the barrel nut. Once knocked loose, it was easy to unscrew from the receiver by hand.
Now that your barrel is no longer mated to the receiver, it’s a good time to scrub the inside of the chamber. You know, the part that’s so hard to reach when the rifle is fully assembled.
Installing the Brownells Wrenchman
While not required, the job is a lot easier if you mount the upper receiver in a vise. As mentioned above, an insert like this one will help hold your upper receiver securely. It’s not a one-time use accessory either. Clamping your receiver this way is also great for general gun cleaning chores, especially if your barrel requires some extra scrubbing.

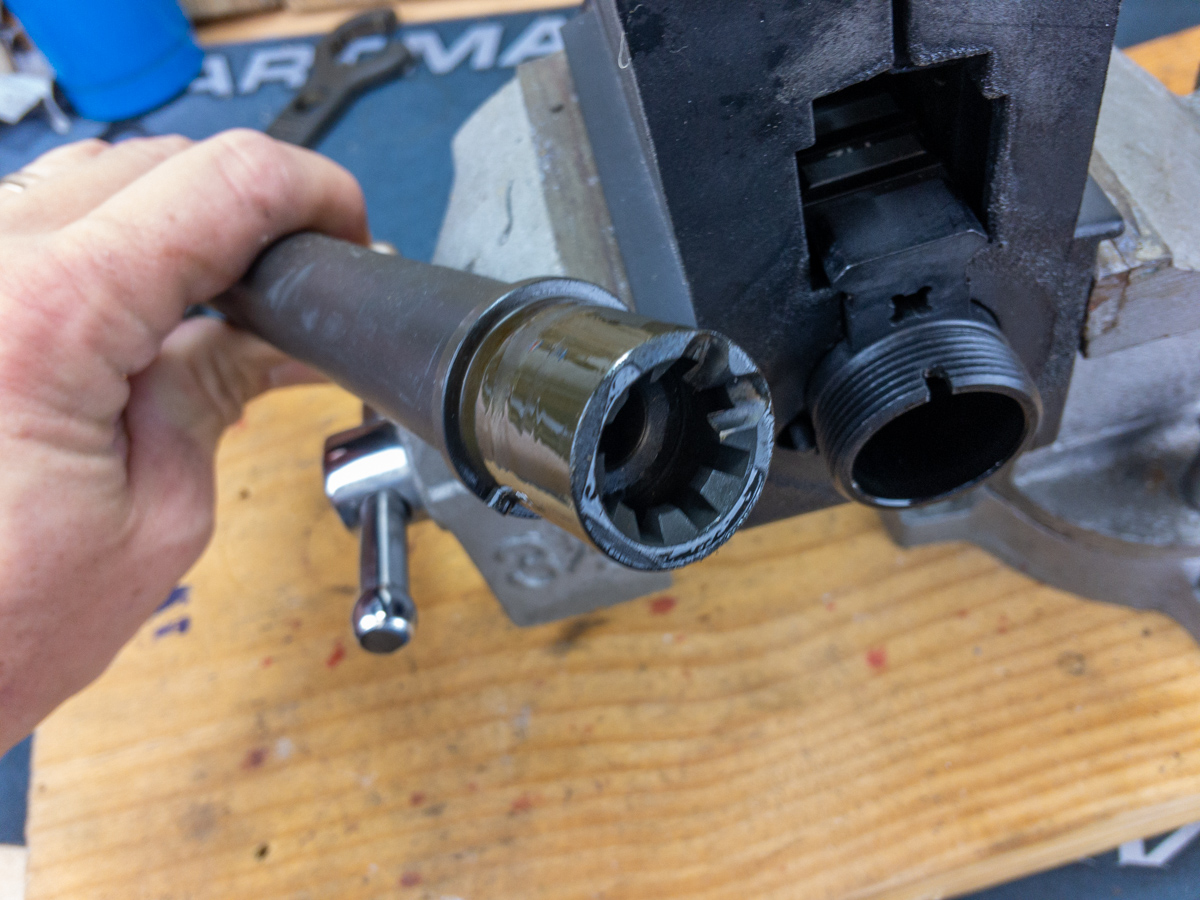
Step one in the AR!5 handguard installation process is to make sure the barrel is re-seated in the receiver nice and tight and inserted as far as it can go. Since you just cleaned it, this shouldn’t be too hard, but some fits are right and might require a little encouragement like heat and gentle tapping.
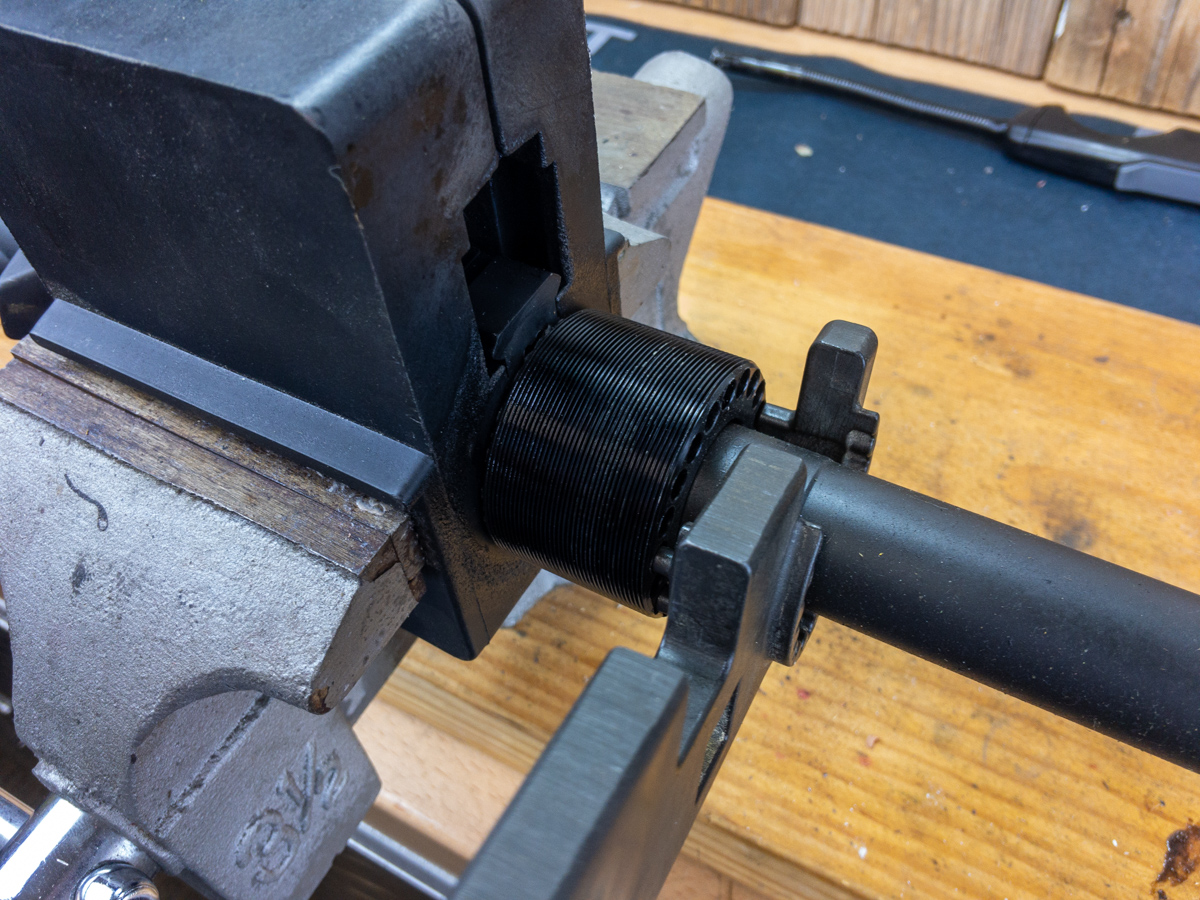
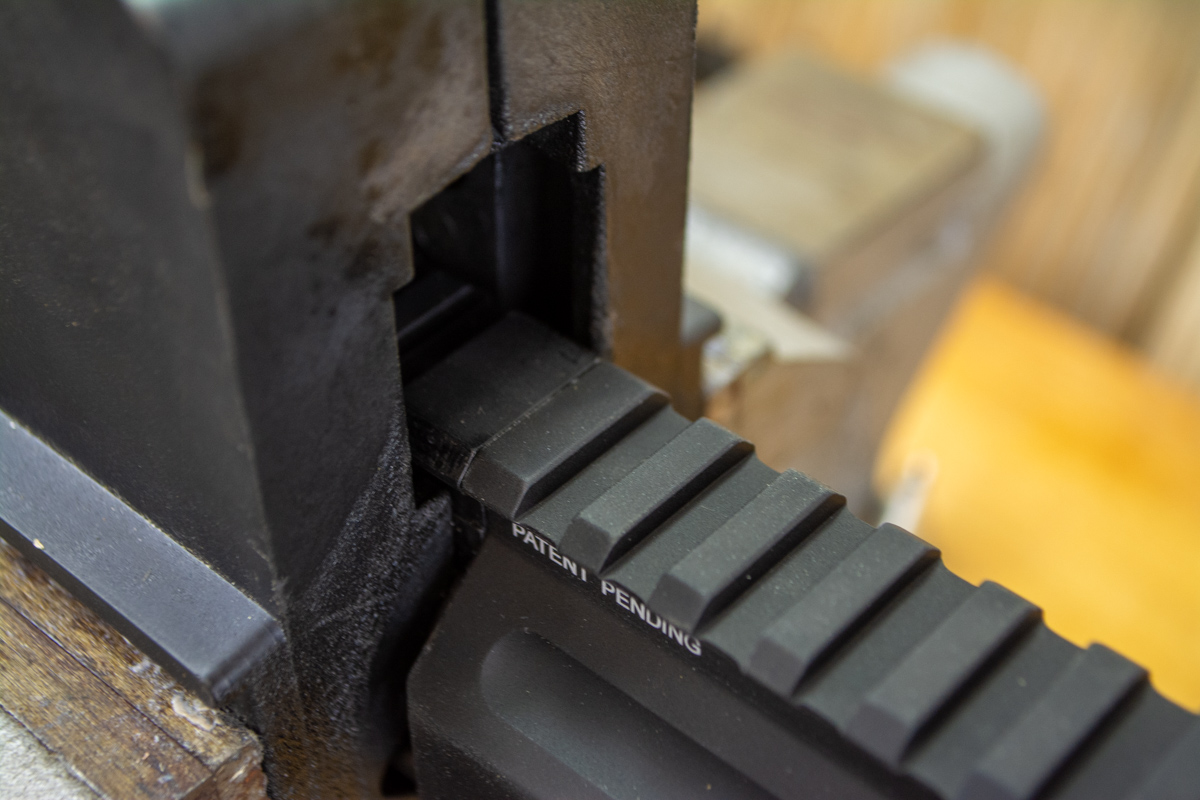
Next, slide the new Wrenchman barrel nut over the barrel, threaded interior end first. Hand tighten the barrel nut to the receiver as far as it can go. Now, install the included timing and alignment adapter onto the barrel nut. It’ll fit tightly and lock into two of the grooves in the barrel nut. Align it so you’ll have to turn the barrel nut about “one more notch” using a wrench.
The timing tool has an inverse of the receiver rail profile cut into the leading edge, so when the barrel nut is perfectly aligned, the tool will slide over the leading edge of the receiver rail. It’ll take some pressure. This process ensures that the grooves in the barrel nut line up perfectly with the gas tube. It also ensures that the handguard will mount to the barrel so that the receiver and handguard rails are seamlessly aligned. If you placed the tool properly, you’ll have to apply some reasonable wrench pressure to bring the tool “one more notch” into final alignment. This provides a proper torque approximation without need for an expensive torque wrench.
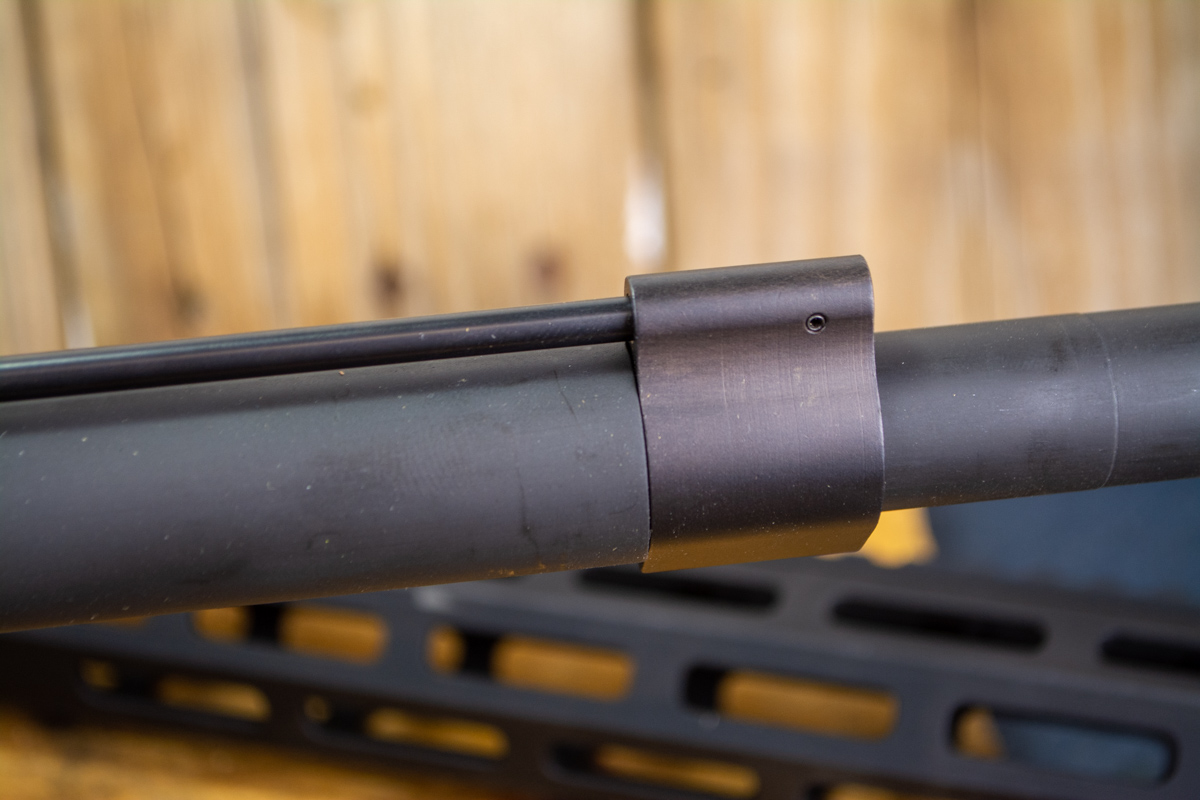
Before you install or change your AR handguard, you’ll need to re-install the existing (or new in this case) gas block, making sure that the gas tube slides over the barrel nut and into the upper receiver hole. After tightening up the gas block (I used some red Loctite on my gas block screws), you can push the handguard into place.
After making sure that the Wrenchman Handguard is firmly seated against the receiver, insert and tighten the locking screws. Brownells recommends using 30 inch-pounds of torque on these screws. If you have a torque wrench for scope rings and such, great. If not, you can get a close approximation by inserting the long end of the Allen wrench into the screws, so you have to turn it with the short end. Tighten as much as you can without causing undue damage to your fingers with that short end of the Allen wrench, and you’ll be in the right torque neighborhood.

Last, but not least, re-install your muzzle device.
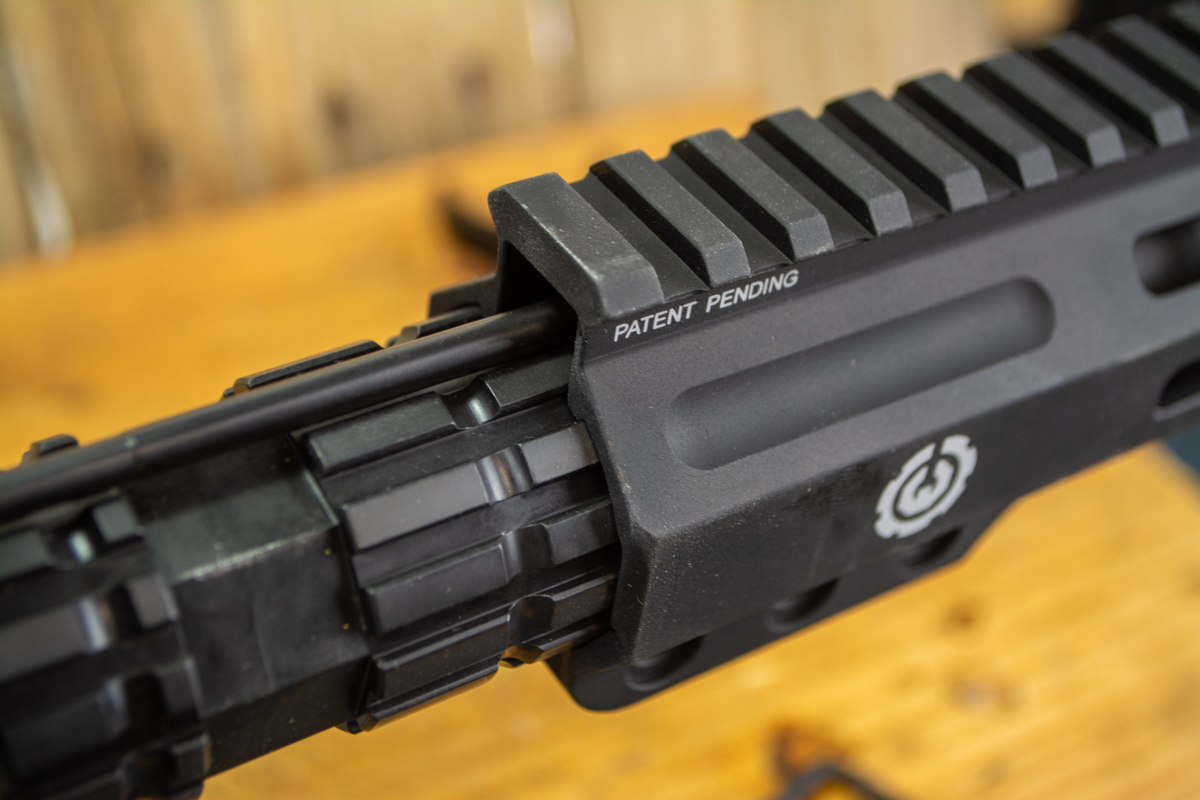
Voila! We’re done with this how-to change your AR’s handguard! That old beat-up rifle has a new life, complete with a longer 12.625-inch M-LOK handguard. I gained lots more room up front along with a much more slender and comfortable gripping surface. The weight didn’t change a bit, even though the new handguard is five full inches longer thanks to the narrower design of the Brownells Wrenchman.
Time to go shooting!

About
Tom McHale is the author of the Practical Guides book series that guides new and experienced shooters alike in a fun, approachable, and practical way. His books are available in print and eBook format on Amazon #ad. You can also find him on Facebook, Twitter, Instagram, and Pinterest.