Tom McHale gives us a simplified explanation on why and how-to Headspace your or AR15 rifle or bolt action long gun.

USA –-(Ammoland.com)- Headspace is one of those firearm concepts that seems way more complicated than it really is.
It’s important to invest a few minutes understanding it, however, because if it’s not right, you can end up with a malfunctioning gun, or worse, one of those self-exploding firearms.
For the “headspace for dummies” definition, think of headspace as the amount of “free space” between the breech face and the bottom of the cartridge case when it’s loaded in the chamber of a gun. We’ll get more precise in a hot second, so hold this simplified thought for now. Just to be clear on terminology, the breech face is the flat part of the bolt, slide or frame where the firing pin hole is located. With semi-automatic guns, the breech face is part of the slide. As the slide moves forward, the breech face presses up against the bottom of the cartridge. The same concept applies to bolt action rifles. With a revolver, the breech face is actually part of the frame behind the cylinder.
Anyway, a cartridge case has to be a little bit smaller than the chamber of the gun so it can be inserted and then extracted after firing, so there is a little bit of wiggle room. Additionally, when a cartridge is ignited, it expands in two directions – on purpose. First, the cartridge case expands outward towards the sides of the chamber. This creates a seal and a fair degree of friction that helps keep the case in the chamber along with the forward pressure of the breech face. Second, the case base stretches vertically towards the breech face, but just a bit. So you also might think of headspace as more or less the amount of front to back wiggle room.
If there is too much wiggle room, then the case may stretch more than it’s supposed to. That can lead to things like failures to fire because of light primer strikes, a case rupture or even a case head separation. Those are bad things as they both result in high-pressure hot gas coming out the sides and/or bottom of the cartridge case. On the other hand, too little headspace means that the space defined by the chamber and the breech face is smaller than the cartridge, so the bolt may not close, or the gun may not go fully into battery.
Technically speaking, headspace is not a measurement of the “free space” but rather a distance from the breech face to different points depending on the type of cartridge in question. Some calibers measure headspace from the breech face to the cartridge rim, others to the cartridge mouth, and so on. Different types of cartridges are positioned in the chamber in different ways. Let’s take a quick look at the three major types of headspacing.
Types of Firearms Headspace

Straight wall pistol cartridges are positioned by the cartridge case mouth pressing up against a ridge in the chamber.

Rimmed cartridges are positioned by the rim of the cartridge case preventing the case from moving further into the chamber.

Rimless bottleneck cartridges are positioned by the shoulder of the case pressing into the chamber itself.
There are some minor variances, but for the most part, these are the primary methods that help determine headspace.
A Headspace Example
Last month, we walked through the process of building a custom Aero Precision AR-15 rifle. With help from our friends at Brownells and Aero Precision, we chose components and assembled a fully functional Arctic Camo AR-15 that one of you is going to win. For details on entering, go here before January 31, 2017.
Anyway, let’s take a look at how we verified that the rifle we built has proper and safe headspace. While the specifics of exactly how to use gauges vary a bit by rifle type, the concepts are the same for making sure that there isn’t too much or too little headspace.
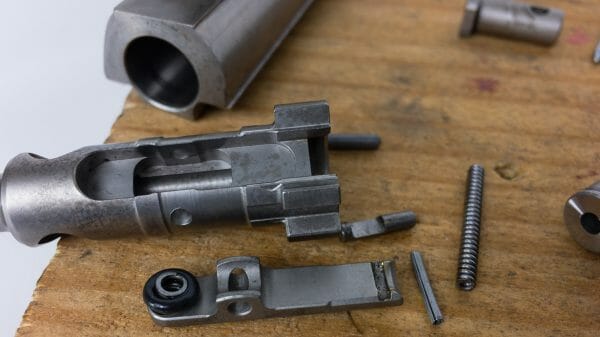
On an AR-15 rifle, there are a couple of things you need to do before checking the headspace. First, clean the chamber and bolt thoroughly, so any built-up carbon or grime doesn’t give you false measurement readings. Second, since the ejector and extractor extend forward of the bolt (breech) face, you’ll need to remove those. That allows you to observe any excess pressure required to operate the bolt with the chamber gauge installed. We want to see how the bolt closes on headspace gauges without anything getting in the way to provide additional resistance.
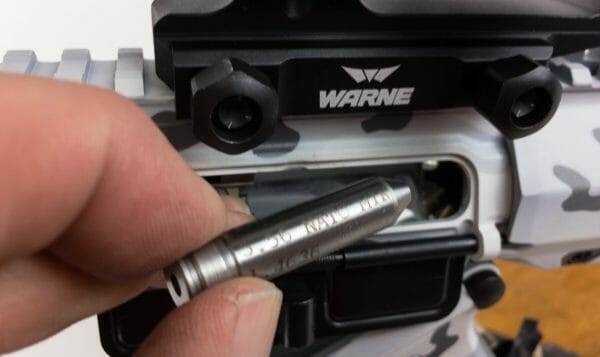
We’re going to use a set of headspace gauges for the AR-15. The set consists of two different chamber inserts, a GO gauge, and a NO GO gauge. OK, so if we get nitpicky, the ones I used are actually MIN and MAX gauges which specify the minimum and maximum NATO chamber sizes for 5.56, but the idea is similar.
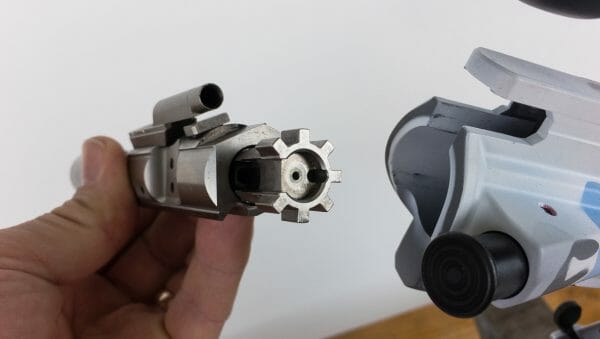
The GO gauge tells you if the chamber has enough, or more than minimum headspace. When you insert the GO gauge and close the bolt, it should close and fully engage with minimal pressure. If it’s tight or requires force to close, then your headspace is at or below spec. In other words, the chamber is too short from breech face to the shoulder.
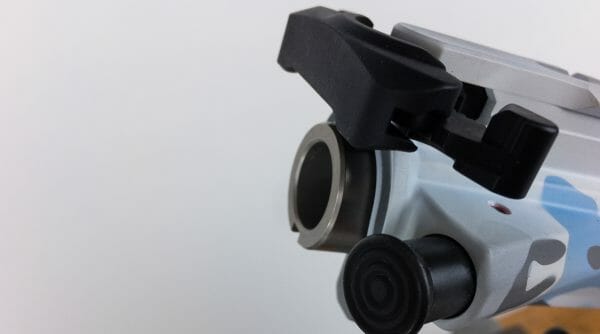
The NO-GO gauge tells you if you have excessive headspace. When you insert this gauge and try to close the bolt, it should NOT close. On an AR rifle like our custom build shown here, the bolt locking lugs should not rotate at all. That’s because the NO-GO gauge is basically a cartridge that’s deliberately made too long. If your bolt closes on this, then there is too much room in your chamber and too much headspace. While we can’t get into all the nitty gritty here, if you have a Colt rifle and it closes on the NO-GO gauge, you may be OK as some Colt chambers are oversized. If you fit in this category, you may need to check your configuration using a maximum headspace or field headspace gauge.
If you turn out to be the winner of the super-sweet rifle shown here, I’ve got good news for you. The Forster MIN and MAX gauges show that this rifle is good to go.
When Should You Check Rifle or Headspace?
New, factory assembled rifles and uppers from reputable manufacturers are checked for safety at the factory, so unless you’re an exceptionally cautious type, there’s no need to do it yourself. However, a used rifle should always be checked since you have no way of knowing its history and who did or did not do work on the gun. Also, any time you change a bolt or do work on a bolt or barrel, such as a barrel or barrel extension replacement, you should recheck the headspace.
And there you have it. Once you get the idea of how GO and NO-GO gauges work, it’s a pretty straightforward concept.
About
Tom McHale is the author of the Practical Guides book series that guides new and experienced shooters alike in a fun, approachable, and practical way. His books are available in print and eBook format on Amazon. You can also find him on Facebook, Twitter, Instagram and Pinterest.